Drywall Installation for Beginners: Common Questions Answered

Have you considered taking on a DIY drywall installation project to give your home a fresh look? It’s a great way to transform your space and make it feel brand new. But if you’re new to the drywall world, you might feel a bit overwhelmed and unsure of where to start.
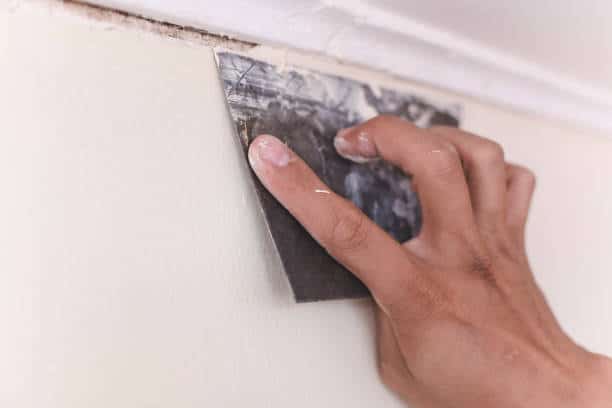
 In this guide, we’ll answer common questions beginners often have about drywall installation to help you confidently tackle your project.

What Is Drywall?

Drywall, or gypsum board or plasterboard, is a common building material used for interior walls and ceilings. It consists of a gypsum core sandwiched between paper facings. Drywall comes in various thicknesses and sizes to suit different applications, making it a versatile choice for residential and commercial construction.

What Tools Do I Need?

Before you start your drywall installation project, gathering the necessary tools is essential. Here’s a basic list of tools you’ll need:

  • Drywall sheets: Purchase the appropriate thickness and size for your project.
  • Tape measure and pencil: For accurate measurements and markings.
  • Utility knife: To cut drywall sheets to size.
  • Drywall saw or rotary tool: For cutting openings for electrical outlets, switches, and other fixtures.
drywall installation tools
  • Screwdriver or drill: Secure the drywall sheets to the wall or ceiling.
  • Drywall screws: Choose screws specifically designed for drywall installation.
  • T-square or straightedge: For making straight cuts.
  • Mud pan and drywall knife: For applying joint compound.
  • Sandpaper or sanding block: To smooth out the joint compound.
  • Drywall tape: To reinforce seams and corners.
  • Corner bead: For protecting and finishing outside corners.
  • Safety gear: Including safety glasses and dust mask.

How Do I Measure and Cut Drywall?

Accurate measurements and clean cuts are essential for a successful drywall installation. Start by measuring the height and width of the area you must cover. Transfer these measurements onto the drywall sheet, marking the cut lines with a pencil. Use a T-square or straightedge to ensure straight cuts, and then carefully cut along the lines with a utility knife.

For openings, like those for electrical outlets or switches, measure and mark their locations on the drywall. Use a drywall saw or rotary tool to make the necessary cuts. Remember to wear safety gear to protect yourself from dust and debris.

How Do I Attach Drywall to the Wall or Ceiling?

Drywall installation is practically attaching a drywall to the wall. Drywall is typically attached to wall studs or ceiling joists using drywall screws. Position the drywall sheet against the wall or ceiling, leaving a small gap between sheets to allow for expansion. Start at one corner or edge and regularly drive screws into the studs or joists. Be sure to sink the screws slightly below the surface of the drywall without breaking the paper facing.

What About Seams and Joints?

Seams and joints between drywall sheets are one of the most critical aspects of a professional-looking drywall installation. To finish these areas:

drywall installation


  1. Apply joint compound: Use a drywall knife to spread a thin layer of joint compound over the seams and screw indentations.
  2. Embed drywall tape: Press drywall tape into the wet joint compound, covering the seams completely.
  3. Apply more compound: Apply a second layer of joint compound over the tape, feathering the edges to create a smooth transition.
  4. Sand and repeat: Once the compound is dry, sand it smooth and repeat the process if necessary, adding additional layers until the seams are invisible.

How Do I Finish the Inside and Outside Corners?

Inside corners can be finished using the same joint compound and drywall tape method mentioned above. For outside corners, use a corner bead, a metal or plastic strip designed to protect and finish corners. Secure the corner bead in place with drywall screws, apply joint compound, and feather the edges for a clean finish.

When Can I Paint or Texture the Drywall?

Painting or texturing the drywall is also part of drywall installation process. Before painting or applying texture to your drywall, ensure all joint compound is completely dry. This may take a day or more, depending on the thickness of the compound and humidity levels. Use a sanding block to smooth out any imperfections before painting or texturing.

Can I Install Drywall Over Existing Walls?

In some cases, you can install drywall over existing walls. However, it’s crucial to assess the condition of the existing surface and ensure it’s stable and free from mold or other issues. You may need to remove old wall coverings or make necessary repairs before performing a drywall installation.

What Are Common Mistakes to Avoid?

Avoiding common mistakes is key to a successful drywall installation. Some common pitfalls to watch out for include:

  • Over-tightening screws: Be cautious not to over-tighten screws, which can break the paper facing and create dimples in the drywall.
  • Uneven joint compound application: Achieving a smooth finish requires patience and careful application of the joint compound. Avoid applying it too thickly or unevenly.
  • Not properly supporting drywall: Ensure that studs or joists adequately support drywall sheets to prevent sagging or cracking.
  • Skipping sanding: Neglecting to sand the joint compound can result in a rough and uneven surface that won’t look good when painted or textured.

Should I Hire a Professional?

While drywall installation is a popular DIY project, it can be challenging, especially for beginners. Consulting with or hiring a professional drywall contractor may be wise if you’re unsure of your skills or the project’s scope. They can ensure the job is done correctly and save you potential headaches in the long run.


In conclusion, drywall installation is a manageable project for beginners with the right tools, techniques, and knowledge. By following these guidelines and taking your time, you can achieve professional-looking results that will enhance the appearance and value of your home. Happy drywalling!

Leave a Reply

Your email address will not be published. Required fields are marked *